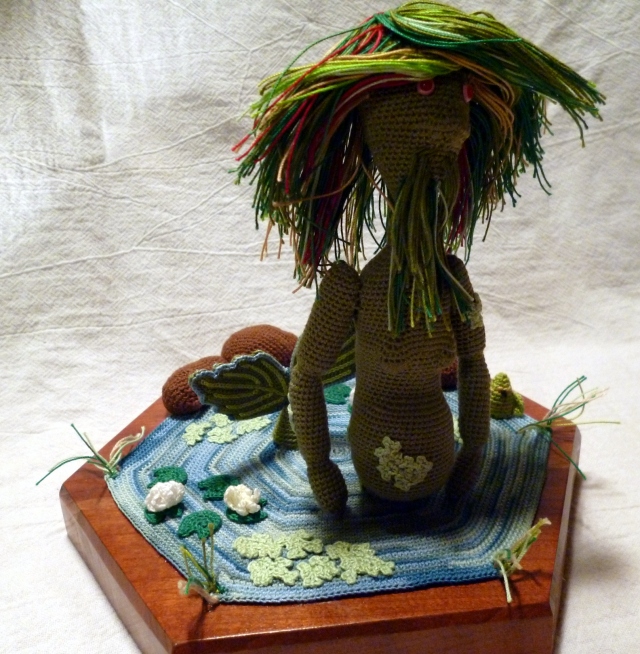
Water Goblin – Vodyanoy – водяно́й

Water goblins or spirits can be found all over the world but one of my favorite representations is from Eastern Europe, namely Vodyanoy. He is said to appear as an old man with a fish tale, covered in muck and algae, with eyes like red-hot coals. He lives at the bottom of lakes and rivers, ponds and marshes, and in the whirlpools of mills. Midnight is his favorite hour but beware of him at any time of day, especially if you are a young woman, as he’s always in search of a wife. Children are also at the top of his list; he will grab them by their legs and drown them given half the chance, dragging them down to his kingdom where he uses their souls as slaves.


Official Project Stats

HOOK SIZE: .90mm & 1.00mm

THREAD SIZE: Size 20 Crochet Thread

TOTAL STITCH COUNT: 18,321

TOTAL HOURS: ~400hours

TOTAL SIZE: 6 INCHES X 6 INCHES

Peach, Mango and Dried Cranberry Tartlet – A Recipe

This is a quick but yummy recipe for peach tarts, though I would imagine the same process could be used with any fruit. Baked in 4.5 inch pans, this recipe makes four generous mini tarts – perfect single servings, especially when topped with fresh cream or ice cream. The Other Half and I enjoy a more tart (no pun intended) pie so taste as you go if you prefer something on the sweeter side and, as always, please let me know how it turns out for you if you give it a try.

Ingredients

Filling

1.25 lbs peaches, peeled and diced

1 mango, peeled and diced

1/4 cup dried cranberries

1/2 lemon, juiced

1/4 tsp ground ginger

1/4 tsp ground cinnamon

1/4 tsp allspice

1/2 tsp dried sage

1 to 3 tbl sugar

1/3 cup water

Pastry

100g unsalted butter, chilled & diced into centimeter cubes

125g plain flour

1/4 cup sour cream

pinch of salt

1) Combine ingredients for filling in sauce pan and, with lid on, bring to a boil. Reduce to a simmer, stirring occasionally & tasting for sweetness. Overall sweetness is determined by preference and ripeness of fruit. Continue to simmer until liquid begins to thicken & fruit softens. If liquid thickens before fruit softens, add a bit more water. Remove lid and continue simmering until filling has reduced to a jam-like consistency. Remove from heat, transfer to a bowl and allow to cool.

2) Meanwhile cut diced butter into flour & salt with either a food processor or a pastry cutter. Once butter & flour are combined enough to resemble large bread crumbs, gradually add sour cream until the dough just comes together. Shape into a disk, wrap in plastic wrap and refrigerate for at least an hour.

3) Preheat oven to 400°F (205°C).

4) Once the filling has cooled and the pastry is sufficiently chilled, butter tart pans and set aside in refrigerator. Dust working surface with flour and roll out pastry dough to 2mm thick. Line tart tins with dough, pressing  into curves of tin lightly & pricking bottom lightly with fork. Fill each tart tin with enough peaches to come within 1mm of top of pastry dough.

5) Bake for 15 to 20 minutes, until pastry is a light golden brown. Allow to cool in tin before removing.

Enjoy!

Lemon-Mint Wheat Crackers – A Recipe

Ingredients

1/3 tsp dry active yeast

150 ml warm water

1 g granulated sugar

2 oz wheat flour

2 oz bread flour

4 oz cake flour*

1 oz cornmeal

8 g fresh mint, minced

zest of 1 lemon

4 g salt

1 tsp black pepper

2 tbl olive oil

melted butter for brushing

kosher salt

*plain flour (available outside of the United States) can also be used

1) Mix sugar and water. Add yeast and set aside to dissolve for 10 minutes.

2) To the yeast mixture, add wheat flour, bread flour, cake flour, cornmeal, mint, zest, salt & black pepper. Mix to thoroughly combine. Add olive oil (or oil of choice). Knead to combine, adding cake flour to prevent sticking. Dough should be fairly wet or sticky, as more flour will be added when rolling out. However, add just enough flour as you work the dough to prevent it from sticking to your hands. Continue to knead for 5 or 6 minutes until dough is smooth and elastic.

3) Place the dough in a well-buttered bowl, turning the dough to coat and cover with plastic wrap. Allow to rise in a warm place until doubled in volume, about 1 hour.

4) When the dough has risen, gently deflate and divide into 4 equal pieces, covering with plastic wrap to prevent dryness.

5) Preheat oven to 400°F (205°C).

6) Dusting work station with cake flour to prevent sticking & with one piece of dough at a time, gently roll out – either with a rolling pin or with a pasta machine – until dough is approximately 1mm thick. Try to achieve uniform thickness throughout to allow for even cooking.  At this point, either place entire sheet of dough on ungreased sheet pan or cut into preferred shapes. Set aside as you continue to roll out the remaining pieces of dough.

7) Before placing in oven, gently prick cracker dough with a fork to prevent bubbling as they cook. Brush with melted butter and sprinkle lightly with salt.

8) Bake for 12 to 15 minutes or until just golden brown. Store in an air-tight container.

This recipe makes dozens of crackers, which can be tedious to make all at once. Since I enjoy having fresh crackers all week, I refrigerate the dough and pull out pieces as needed. The refrigeration process retards the yeast, keeping the dough from rising. Simply let the dough sit at room temperate for an hour before use and then proceed with Step 6.

The Snow Maiden – Snegurochka – Снегу́рочка

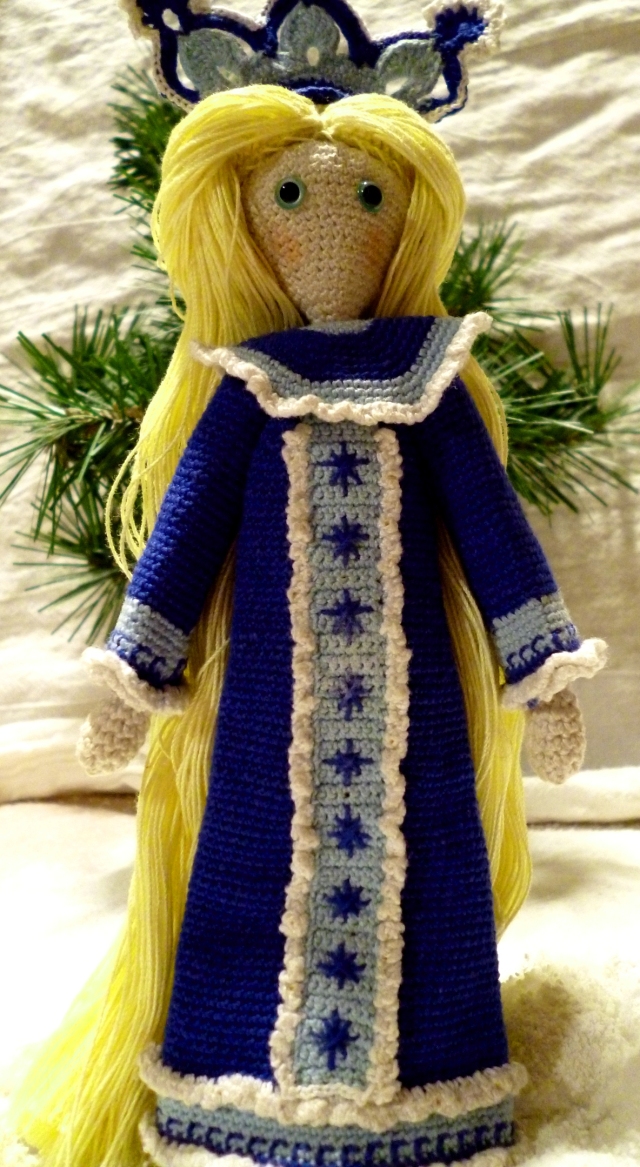
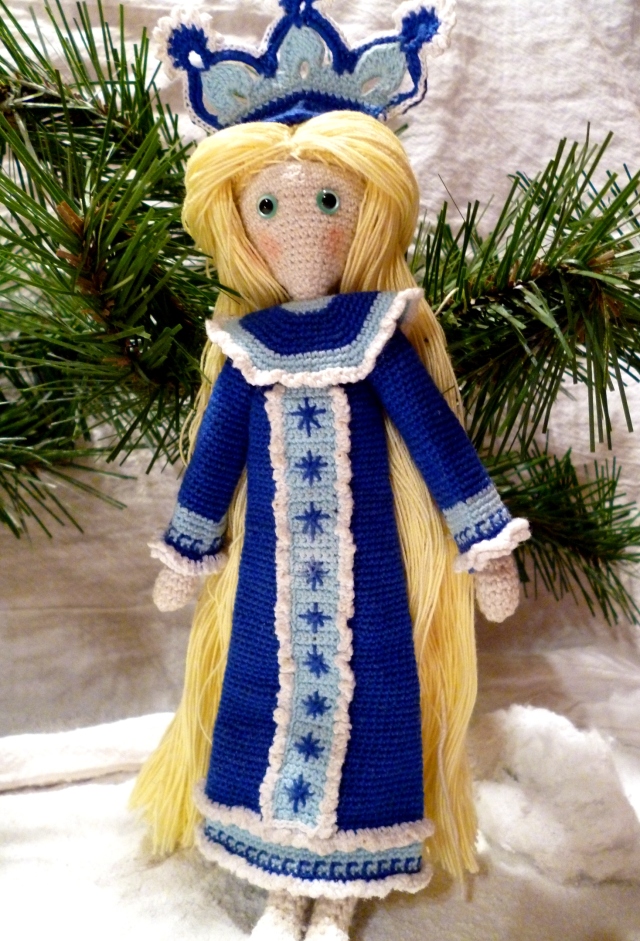
I have always loved folktales, mythology and fairy tales – just not the Disney versions. I spent many an hour in my childhood under the canopy of Japanese maples, listening for leprechauns and fairies, creating houses for them out of walnut husks and scraps of fabric.  To this day, I still make rice pudding every Christmas Eve for Tomte, just so I don’t tempt fate. So, without further adieu, I bring you the Eastern European character of The Snow Maiden. You can read more of her story here if you’d like.

She is made with two different sizes of thread and three different sizes of crochet hooks. Her hair alone contains almost 200 yards of thread or almost 20 grams.

The final doll includes, approximately, 12, 731 stitches and took me over 300 hours to complete.

She does have shoes but, I have to admit, while I did finish one – by the time I had sewn her all together – I just didn’t feel it was good enough. And, frankly, I just didn’t have the energy to make them tonight. She might just have to prance about the snow barefoot for awhile.


She is, in the end, 7 and 3/4 inches tall. Her head is only slightly larger than a (US) quarter. There are some things I’m not exactly happy with, some things I still need to fix, but overall she’s pretty amazing, I think. After almost a month, however, I’m definitely ready to start my next project. And a nap. I could definitely use a nap.

Water Lily Lace Bracelet Pattern

Someone (not me) might have neglected to remember their sister’s 50th birthday and so I took a couple of days off of my secret project to work on a gift for her. I’m really pleased with the way it turned out, so much so that I’m sad to see it go. Hopefully, she’ll enjoy wearing it as much as I enjoyed making it (there’s a little trepidation because she’s a jewelry artist).

I thought I would go ahead and share the pattern with everyone. Don’t be intimidated by the use of crochet thread instead of yarn. It takes a little getting used to but works up really quickly and simply once you get the hang of it. And, as always, feel free to comment if you have any questions!

Water Lily Lace Bracelet Pattern

Materials:

No. 20 Cotton Thread (Light Blue)
No. 20 Cotton Thread (Dark Blue)
.90 mm hook
sewing thread in dark blue and white
clasp of choice
pearl accents

Abbreviations

ch – chain
sl st – slip stitch
st/sts – stitch/stitches
sc – single crochet
hdc – half double crochet
dc – double crochet
tr – treble crochet

Special Stitches

Picot – chain 3, slip stitch in 1st chain made

Flower (make 3)

ch 5, slip stitch to join

Rnd1: ch 2, 11 hdc in ring, sl st to join -12sts

Rnd2: (ch 6, sl st in next 2 sts) repeat ( ) around 6 times

Rnd3: [(In loop, sc, hdc, 2 dc, tr, picot, tr, 2 dc, hdc, sc), sl st in space between loops] repeat [ ] around – 6 petals

Fasten Off & Weave in Ends

Leaf (make 12)

ch10

Row1: Starting on 2nd ch from hook – sc, hdc, dc, dc, tr, dc, dc hdc, sc, ch 1

Working on opposite side of chain – sc, hdc, dc, dc, tr, dc, dc, hdc, sc

Picot

Slip stitch in 1st sc. Fasten off. Weave in ends.

To Finish
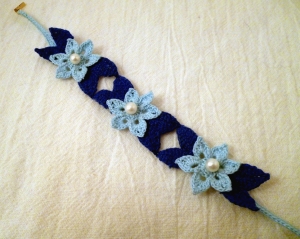
Pin leaves and flowers flat and starch rather heavily.

Once dry, sew together – with dark blue sewing thread – using whip stitch & straight stitch, being careful to work through crochet stitches instead of over them, so sewing thread will not show through on finished piece. Attach pearls by threading white sewing thread through the center of pearl and pulling both threads through center hole of flower. Tie a knot and weave ends through crochet stitches of flower, being sure to knot securely to flower.

To create strap for clasp, chain desired length & half double crochet across. (Average women’s wrist size is 7.5 inches)  Instead of weaving in ends, use to attach clasp to strap with knot and then weave ends into strap. Sew straps to the back of bracelet.

I hope you enjoy! If I have left anything unclear, please do let me know and I’ll try to clarify or correct!